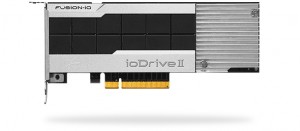
A customer of mine, who was already running a vSphere environment on Cisco UCS blades, asked to expand his environment with a number of ESXi hosts that could run a VMware View environment. To be able to run as much View desktops on each host as possible, we offered them Cisco UCS Blades equipped with a Fusion IO card, the UCS 785GB MLC Fusion-io ioDrive2 to be exact.
For this customer I had already deployed a vSphere environment a year ago, fully based on VMware Auto Deploy and it now was time to try and add a driver to this Auto Deploy environment, which I had never done before. It wasn’t an easy road, but I wrote down all the steps and hope it helps you should you ever have to do this too.
Download the drivers
The company Fusion IO has a very tight policy as it comes to driver downloads. You can only get access to the support site and download the drivers after registering the serial number of the Fusion IO card. This will grant you access to the support site, but only to the drivers for that specific card. Very inconvenient when you’re only the guy implementing the stuff and especially if the cards are already built-in the UCS Blades located in a datacenter far far away.
After some time on the phone with their support department, I was able to get a link to the Cisco Support site and download a big ISO file containing all drivers for the Cisco UCS Blade. After unpacking the ISO and browsing through the folders, the Fusion IO driver only contains a shortcut to…….. the VMware Website. And there it is, free for download, the Fusion IO driver: VMware website – Fusion IO driver
After you downloaded the driver zip, place it in a separate directory and unpack it. In the directory in which you unpacked the zip, you will now find the following:
- Fusion-io_bootbank_block-iomemory-vsl_3.2.2.869-1OEM.500.0.0.472560.vib
- iomemory-vsl-5X-3.2.2.869-offline_bundle-895853.zip <– this one we want !!!
- Subdir: doc
Prepare the Auto Deploy image
For the deployment we need three images. One is of course the ESXi image that can be downloaded from the VMware website, second is the Fusion IO driver (iomemory-vsl-5X-3.2.2.869-offline_bundle-895853.zip ) and third very often is the vmware-fdm VIB for VMware HA.
I’m using vc-mgmt.vanzanten.local as the vCenter Server since that is the one running in my homelab, replace it by your own vCenter Server. Let’s get started:
Connect-VIServer -Server vc-mgmt.vanzanten.local
Add-EsxSoftwareDepot -DepotUrl https://hostupdate.vmware.com/software/VUM/PRODUCTION/main/vmw-depot-index.xml
Add-EsxSoftwareDepot f:\AutoDeploy\iomemory-vsl\iomemory-vsl-5X-3.2.2.869-offline_bundle-895853.zip
Add-EsxSoftwareDepot http://vc-mgmt.vanzanten.local/vSphere-HA-depot
Make sure that with both above actions you get a response similar to this:
Depot Url:
zip:F:\AutoDeploy\iomemory-vsl\iomemory-vsl-5X-3.2.2.869-offline_bundle-895853.zip?index.xml
After these three depots have been added, we can now combine packages from them into a rule, we just need to find out which ESXi image we would like to use. Let’s take a look:
Get-EsxImageProfile | Sort-Object -Property name | ft Name
You now get a list of all images available, for this case I pick the image: “ESXi-5.1.0-20130504001-standard” and use it to create a new ImageProfile called “ESXi-5.1.0-20130504001-std-FusionIO” and give it a Vendor ID.
New-EsxImageProfile -CloneProfile "ESXi-5.1.0-20130504001-standard" -Name "ESXi-5.1.0-20130504001-std-FusionIO" -Vendor "Fusion-IO"
You should get similar output like this:
Name, Vendor, Last Modified, Acceptance Level
ESXi-5.1.0-20130504001-std.., Fusion-IO, 5/1/2013 07,PartnerSupported
Now we want to add the drivers to this new profile but for this we need to know the name of the software package that holds the Fusion IO driver. Run this to get a list of all software packages available:
Get-EsxSoftwarePackage
When you browser through this list, you’ll see one line like this:
block-iomemory-vsl 3.2.2.869-1OEM.500.0.0.472560 Fusion-io 10/28/2012 01
We now know that the software package is called “block-iomemory-vsl”. Let’s add it:
Add-EsxSoftwarePackage -ImageProfile "ESXi-5.1.0-20130504001-std-FusionIO" -SoftwarePackage "block-iomemory-vsl"
And last but not least, let’s add the VMware HA package, which is called “vmware-fdm”:
Add-EsxSoftwarePackage -ImageProfile "ESXi-5.1.0-20130504001-std-FusionIO" -SoftwarePackage "vmware-fdm"
Deploy rules
What we’ve done until now is create a new ESXi image that can be deployed to an ESXi host, but we didn’t create any rules for deployment yet. I have already explained this in earlier posts, so I’ll keep it short. Deploy this image to the ESXi host with IPv4 address 192.168.0.146 and assign the image “ESXi-5.1.0-20130504001-std-FusionIO”. Put the host in the cluster CL-MGMT and use the host profile named “ViewFusion-Hosts”.
New-DeployRule -Name "ViewHosts-FusionIO" -Item "ESXi-5.1.0-20130504001-std-FusionIO", "CL-MGMT", "ViewFusion-Hosts" -Pattern "ipv4=192.168.0.146"
You might get the following error when doing this:
New-DeployRule : 6/14/2013 19:56:58 New-DeployRule Could not find a trusted signer
Try this command to fix it and then run it again:
$DeployNoSignatureCheck=$true
This command will take some time to complete. After this we need to push the Deploy rule to the “Active-Set”:
Add-DeployRule -DeployRule “ViewHosts-FusionIO”
We’re almost done after this, just a little fix is needed:
Get-VMHost * | Test-DeployRuleSetCompliance | Repair-DeployRuleSetCompliance
When you now look at the screen of the ESXi hosts booting, you should see the line with “block-iomemory” passing by.

One thought on “Add Fusion IO driver to VMware Auto Deploy”
Comments are closed.