On the VMware Labs pages you’ll find a number of great Lab projects, so called “Flings”. These are unsupported projects by VMware employees you can download and use. One of the latest VMware Lab Flings is the “Auto Deploy GUI” created by Massimiliano Daneri which makes auto deploy of your ESXi hosts a breeze.
As you probably know, VMware Auto Deploy is a new feature in vSphere 5 that enables you to run your ESXi5 hosts stateless in memory. No disk, no USB drive is required, the host uses PXE boot to load the hypervisor and is completely run in memory. For all those admins using VMware Auto Deploy and getting sick of doing everything through the PowerShell command line, I can highly recommend the Auto Deploy GUI. It makes your life so much easier.
My series on VMware vSphere 5 Auto Deploy:
vSphere 5 – How to run ESXi stateless with vSphere Auto Deploy
vSphere 5 Auto Deploy PXE booting through Cisco ASA firewall
Updating your ESXi host using VMware vSphere 5 Auto deploy
My first Auto Deploy design for real production environment
A quick walkthrough
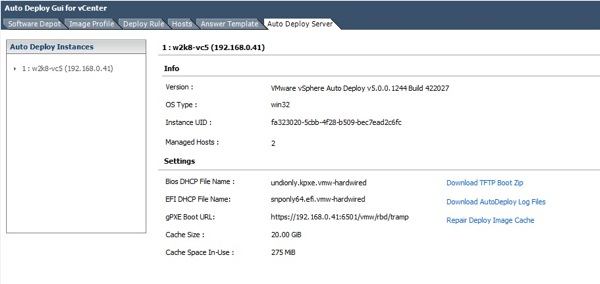
The VMware Auto Deploy GUI is installed as a plug-in in your VMware VI Client. Unlike many plugins, this is not just a webpage shown in the vCenter GUI but really integrates into the interface, you won’t even notice it is a separate plug-in you’re using, very nice. In the VI Client you’ll find the Auto Deploy GUI in the “solutions and appliances” tab. Start it from there and you’re welcomed by the “Auto Deploy” screen which shows to which vCenter Auto Deploy server you are connected.
When creating a new deployment image, the first step is to add a software repository where the binaries can be downloaded. This can be done on the first tab, called “Software Depot”. In a very simple way you can add a software depot URL, for example VMware’s own software repository: https://hostupdate.vmware.com/software/VUM/PRODUCTION/main/vmw-depot-index.xml. In the bottom half of the screen you’ll see what is already locally available.
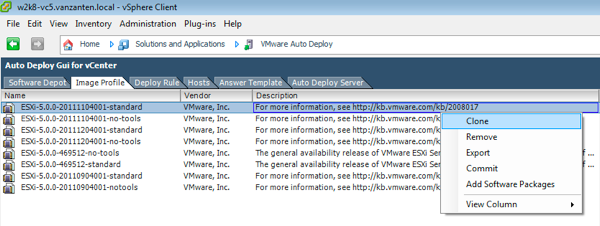
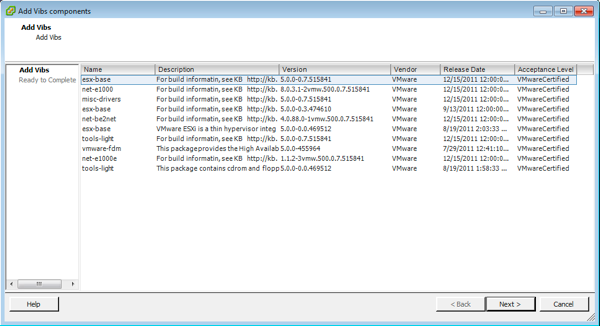
The next step is choosing the ESXi image you want to use for deployment. This can be done in the “Image Profile” tab. You can see the images available and then choose what you want to do with it, clone, remove, export, commit and “Add software packages”. Want to add some extra VIB files? No problem, there is a nice wizard for that. If you want to create your own very custom build, just clone an existing image and add your custom software to it.
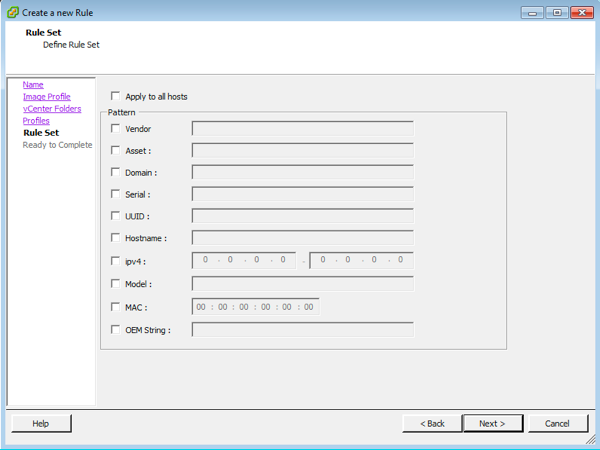
Now your image is ready and you need to deploy it. This is where you go to the “Deploy rule” tab and create a new deploy rule. Again an easy to use wizard will guide you through the process. The wizard even helps you with defining all the parameters you want to use in your rule set like vendor ID, Mac address, IP address, etc.
After the wizard has finished, you’re only left with creating the answer files in the “Answer template” tab and then you’re done. You’re ready to deploy your image. I won’t get any easier.
Congrats to Massimiliano for building such a great tool. This is more than the average “tool” that helps you a little when fighting with command lines, setting changes, etc. This is a full-blown product and when using it, you’ll never have to see that ugly Auto Deploy PowerShell command line again. I hope VMware will soon support this Fling and add it to vCenter as a standard installation option.


Does this work with Vcenter appliance?
Yes