In the first part I wrote on “VMware vCloud 5.1 Networking for dummies” I showed an easy way to setup and attach VMs to an organizational network and give them access to the external network and the internet. In this second part I will show you how to connect VMs to a vApp network and protect them from the organizational network, but make it possible for them to access the external network.
The Plan
- Create a vApp named vApp-02
- Have it run 2 VMs in an isolated vApp network
- The VMs should get their IP address through DHCP
- The VMs should be able to access the external network and access each other.
- No other VMs should be able to access the VMs inside this vApp
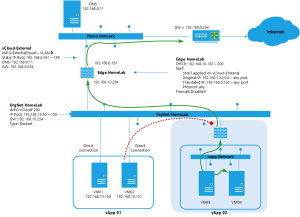
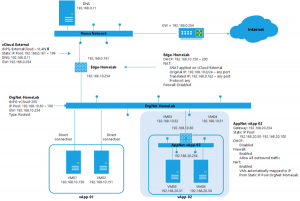
See the following design that is based on the design created in the first post. The shaded part will be added in this blogpost.
The vApp Network
To create a vApp Network you’ll have to create a vApp first. I have created a Cloud named “HomeLab” and from there I click “My Cloud” and create a new vApp by pressing the “Build new vApp….” button. This starts a wizard which first asks you for the vApp name, in my case “vApp-02”. Next I add the “Ubuntu VM” from my catalog twice because I want two VMs. In “Configure Resources” I name the VMs “Ubuntu 03” and “Ubuntu 04”, next I configure the virtual machines by renaming the computer names to “Ubuntu 03” and “Ubuntu 04”. Now the interesting part is when you select the network type for each virtual machine.
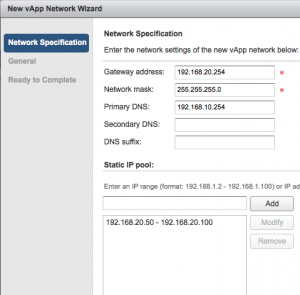
 I don’t want to connect to the existing organizational network, so I press “Add Network…” to create a vApp network. The “new vApp Network wizard” starts and will ask for the network specifications. I like my gateway to be on x.x.x.254, so I enter 192.168.20.254 as gateway, network mask 255.255.255.0 and I use the DNS from the already existing Edge with IP 192.168.10.254. A Static IP Pool is added with the range of 192.168.20.50 – 192.168.20.100. The next screen asks for the network name which will be “AppNet-vApp-02”.
When back at the virtual machine options, the IP assignment options are available.
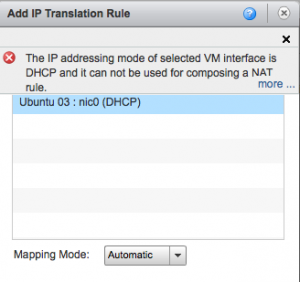
Select “Static IP Pool” to automatically create a NAT rule which will automatically map the interface to an external IP. The strange thing is that if you want to use DHCP, no NAT rule will be created right now and you can’t create this NAT rule later on when trying to change the vApp networking. See the following screenshot for the error that shows when trying to create the NAT rule:
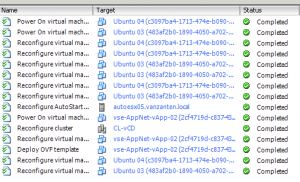
After selecting “Static IP Pool” assignment for the networks of the VMs continue to the next step “Configure Networking”. This is where the vApp network is connected to the organizational network by selecting “OrgNet-HomeLab”. Enable “NAT” and “Firewall” as options. That’s it, the wizard is finished now. In the vSphere Client the tasks show how the VMs are cloned for your vApp.
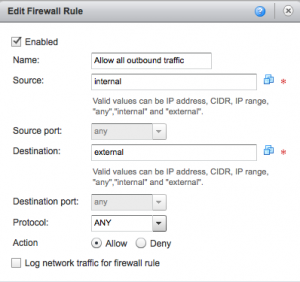
To double check what the vApp wizard created open the vApp and see the three tabs “vApp Diagram”, “virtual machines” and “Networking”. Go to the networking tab, see the “AppNet-vApp-02” network and right click and choose “Configure Services”. You’ll now see the DHCP tab and see the DHCP is not enabled. Use this DHCP “server” only to give out IP addresses to VMs inside the vApp that will NOT use NAT translation! Next tab is the firewall and it will show “Enabled” and have a rule that allows all outbound traffic. There is no need to change this.
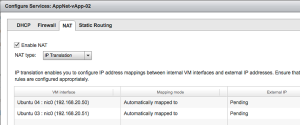
On the “NAT” tab you should see both VM Interfaces with a mapping mode of “Automatically Mapped to” and External IP is “Pending”. As soon as the vApp is running you will see External IPs used in the NAT translation. After making changes in these tabs and clicking OK, you should not forget to press “APPLY” !!!
Now start the vApp and see if everything works. In the vCenter tasks you immediately see how the vShield Edge appliance is deployed namen “vse-AppNet-vApp-02(something something) and the reconfiguration of the VMs and power on action of the VMs.
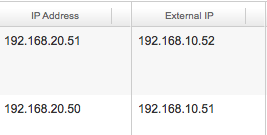
After the vApp has started and the VMs are running, the internet to external IP mapping is shown on the virtual machines tab of the vApp.
The ultimate test of course is to logon to the VM and see which addresses are pingable and if internet access is working. I logged into ubuntu 03 VM who has IP address 192.168.20.51. Tests performed:
- Ping 192.168.20.50 – passed
- Ping 192.168.20.254 – failed !
- Ping 192.168.10.150 – passed
- Ping 192.168.10.254 – passed
- Ping 192.168.0.254 – passed
- nslookup www.GabesVirtualWorld.com – Passed
- wget www.gabesvirtualworld.com – Passed
- From VM ubuntu 01, which is directly connected to OrgNet-HomeLab, ping VM ubuntu 03 on the external address 192.168.10.52 – Failed!
Why did test 2 en test 8 fail? Because the firewall is enabled and doesn’t allow pinging the firewall it self.
Eventually my environment now looks like this:
Lightbulb moment
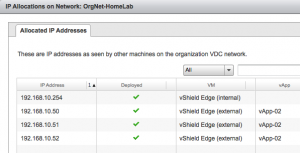
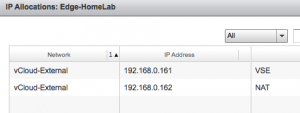
What I was struggling with was the question why the vShield Edge needs so many external IP addresses. If you go to the OrgVDC-HomeLab properties and check the Edge Gateway External IP allocations and the OrgVDC Network IP Allocations you’ll see that it is eating away addresses from the static IP pools, where I would have expected that each Edge would have just one external IP and use that for NAT translations.
But when thinking of this now, I understand that with just one external IP it would become very difficult to make multiple websites within for example one vApp, accessible from the outside. You would than need the extra external IP addresses to make the port forwarding possible. So the way vCloud works is that it allocates all these addresses up front to avoid any confusion. Right???
If any of the vCloud Networking Guru’s has something to add or would like to explain some more, be my guest…..
Overview of this VMware vCloud 5.1 Networking for dummies:


“So the way vCloud works is that it allocates all these addresses up front to avoid any confusion. Right???”
Pretty much, although you have to assign them manually as I recall. So we’re talking about two things here: Network Address Translation (a one-to-one mapping between an internal and an external IP address) and Port Address Translation (a mapping of an internal IP address and port to an external IP address and port). Webservers are generally expected to be listening on TCP port 80, and with PAT and one external IP there’s only one external TCP port 80 available, so you can only have one internal webserver publically accessible.
e.g. NAT:
internal address,internal port,external address, external port
192.168.1.10,80,163.1.0.28,80
192.168.1.20,80,163.1.0.29,80
both webservers are available publically at 163.1.0.28 and 163.1.0.29
PAT:
internal address,internal port,external address, external port
192.168.1.30,80,163.1.0.28,80
192.168.1.40,80,163.1.0.28,81
but with PAT, that second webserver 192.168.1.20 has to listen on port 81 on external address 163.1.0.28…and we have a problem.
Of course with NAT and a one-to-one mapping you quickly run out of IP addresses so in practice a combination of both NAT and PAT is generally the way forward. Until IPv6 is supported on the Edge devices, anyway.
Often people refer to NAT when what they are really talking about is PAT. These days PAT means PAT – and NAT means either NAT or PAT ;-)
Good stuff, helped me a lot. One of the best written vCloud networking article.
Great tutorial, I was turning DHCP ON and that was my mistake!. :) thanks a lot!. hmm so,
ah. so. Edge Services only support NAT? not PAT? or PAT can be setup to allow X external IPs connect to Y internal much more system IPs.
Do you have these same instructions but for building a fenced in IPv6 network? I have not been able to find really any good PDF files or doc files from VMware on how to build an IPv6 network.
My own research has led me to the following:
In the Gateway address field I have 1920:1680:0020:0001::64
Netmask is still 255.255.255.0 but I feel based on VMwares own docs it should be ffff:ffff:ffff:ffff
But that does not work either.
Primary DNS is 1920:1680:0020:0201::64
DNS suffix is ipv6.training.com
Statis IP pool, I have not been able to create, not sure what to add in this field.
Sorry, I have no clue with ipv6 :-(